

This tutorial was written by Monti on October 10th 2007 and reworked on 13th October 2014. It's concept is copyrighted to Monti. Any creation you make from my ideas are yours. You may print out this tutorial for your own personal use, but please do not copy it in any way to put online, pass out or rewrite without my permission or worse yet attempt to claim as your own.
This was written for PSP 9 but will work in other versions.
For this tutorial you will need:
Paint Shop Pro
Script Font of your Choice
I used Passions Conflict which is a pay font so I cannot supply.
An Image or Tube of your choice
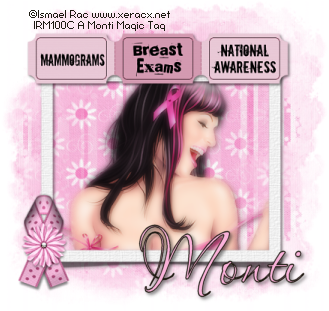
The tube used in this tutorial is ©Ismael Rac used with a license. You can get a license to use his work from www.store.xeracx.net
Please only use an artist you have permission to use.
A Scrap Kit of your choice
I am using the Breast Cancer kit by Melissa at Scrappy Expressions. Thank you Melissa.
You can download Here
Masks 22, 38 and 23 by Becky (formerly Secrets of the Imagination)
Download Here
Save them to your mask folder.
Ok we are ready to start.
REMEMBER TO SAVE OFTEN
Step 1:
Open a new image 600 x 600 pixels.
From the Breast Cancer Kit open a paper of choice - I used Paper 3 - and copy and paste this as a new layer on your canvas.
Go to Layers - Load Mask from Disk - and apply Beckys Mask 022 with the following settings.
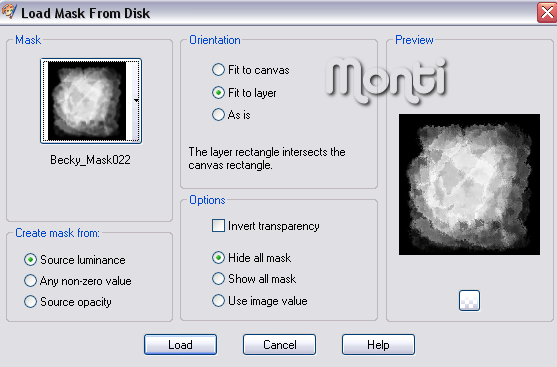
On the layer palette right click the mask layer and choose Merge Group.
Choose another paper of your choice - I used Paper 2 - and copy and paste this as a new layer on your canvas.
Go to Layers - Load Mask from Disk - and apply Beckys Mask 038 with the same settings we used earlier.
On the layer palette right click the mask layer and choose Merge Group.
Choose another paper of your choice - I used Paper 1 - and copy and paste this as a new layer on your canvas.
Go to Layers - Load Mask from Disk - and apply Beckys Mask 023 with the same settings we used earlier.
On the layer palette right click the mask layer and choose Merge Group.
Resize this mask layer by 85% - Bicubic Selected and All Layers UNChecked.
Step 2:
Copy and paste the Frame as a new layer on the canvas.
Resize by 80% making sure ALL Layers is UNChecked.
With your Magic Wand click in the middle of the Frame.
Go to Selections - Modify - Expand by 3 then Selections - Invert.
Open the image or tube of your choice.
If you are using a tube and want a background to it press Shift D to make a duplicate and then simply add a new layer and add a colour of gradient of your choice, move it to the bottom and merge all visible.
Copy and paste the tube/image as a new layer on your canvas and move it beneath your frame.
Press Delete on your keyboard and then Deselect.
Activate the Frame layer and add the following Drop Shadow.
Vertical: 2
Horizontal: 2
Opacity: 50
Blur: 5
Colour: Black
If you are using a tube and not an image add this Drop Shadow to the tube too.
Duplicate your Tube/Image layer.
On the Original go to Adjust - Blur - Gaussian Blur - Radius 3
On the duplicate layer change the blend mode to suit your tube. I used Soft Light.
Step 3:
Open the Ticket Stubs and copy and paste as a new layer.
Move them to the top center of the frame and resize by 55% - Weighted Average Selected and All Layers UNChecked.
Add the same Drop Shadow we used earlier.
Open the Awareness Ribbon of your choice and copy and paste it as a new layer.
Move it to the bottom left side of the Frame. I resized mine by 60%.
Add any other elements from the kit that you want.
Crop to Size using Merged Opaque.
If you want to you can use your Deform tool on the Mask layer to move the top and bottom in slightly.
Resize your tag if desired.
Add the artists copyright and your watermark on a new layer.
Add your name using a font of your choice and add the same Drop Shadow we used throughout.
Save.

No comments:
Post a Comment